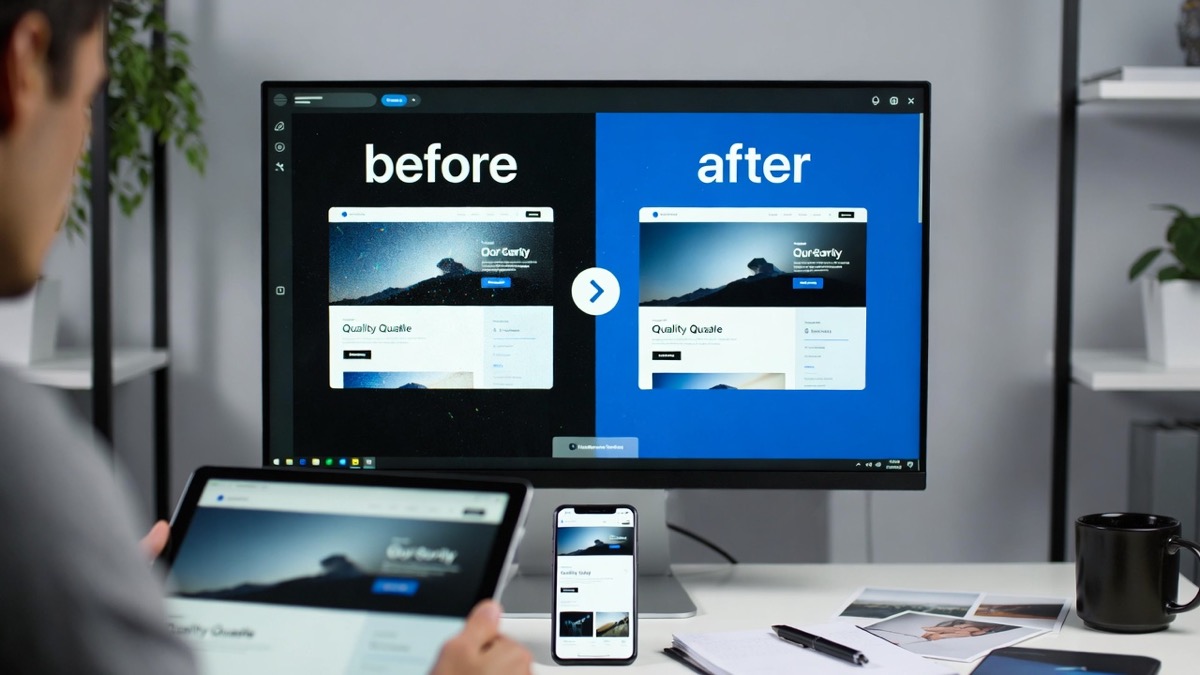
Good images sell. Bad images leak trust. A blurry hero banner, a pixelated product shot, or a heavy file size slows pages and makes your brand look cheap. Image quality has two sides: visual clarity and performance. You want sharp, clean visuals at the smallest file size that still looks premium.
This guide gives a free, practical workflow. You will fix common issues, batch process assets, and publish images that look better and load faster.
If you need a quick online option to start, you can test free image quality enhancement in the first minutes of your audit.
What “image quality” means for a business website
Image quality is not only resolution. It is also clarity, noise control, color accuracy, compression balance, correct sizing, modern formats, and delivery. A 150 KB image that looks sharp beats a 2 MB image that looks soft.
| Quality factor | What good looks like | Why it matters |
|---|---|---|
| Clarity | Clean edges, readable details | Improves trust and perceived professionalism |
| Noise control | Smooth shadows, minimal grain | Keeps photos premium, avoids “cheap” look |
| Color accuracy | Consistent brand tones, natural product colors | Reduces returns and confusion |
| Compression balance | Small file, no visible artifacts | Faster load, better UX |
| Correct sizing | Right dimensions for layout | Avoids wasted bandwidth |
| Modern formats | WebP or AVIF when supported | Better quality at lower size |
Start with a quick image audit
Before editing anything, audit what you already publish. Focus on the pages that drive revenue and leads, then fix the images that hurt perception or speed.
| Audit step | What to check | What to write down |
|---|---|---|
| Top pages | Homepage, services, top posts, product pages | URLs, image count, biggest files |
| Visual issues | Blur, pixelation, halos, washed colors | Which images look “cheap” |
| Performance issues | Large images above the fold | Which images delay first load |
| Real sizes | Original dimensions vs display size | Oversized images to resize |
Targets that work for many business sites: hero banners at 1600 to 2400 px wide depending on your layout, content images around 1200 px wide, and thumbnails around 400 to 600 px wide. For logos and icons, prefer SVG when possible.
Free tools that cover almost every need
You do not need one tool. A simple stack works better if you pick the tool for the job.
| Tool | What it does | Best for |
|---|---|---|
| Upscayl (desktop) | AI upscaling and cleanup | Small images, old photos, minor blur |
| GIMP (desktop) | Manual editing, color, sharpening | Hero images, product photos, brand visuals |
| Photopea (browser) | Quick edits, PSD support | Fast work without installing software |
| ImageMagick (desktop) | Batch resize, convert, compress | Large libraries, repeatable workflows |
| Squoosh (browser) | Format comparison and compression | Final export decisions |
The free workflow that consistently delivers better images
This sequence avoids quality loss and keeps the process simple. Use it for every important image.
Step 1: Choose the right source image
Start with the best original you have. Avoid screenshots. Avoid images re-downloaded from messaging apps.
Step 2: Crop for purpose
Crop to your layout. Do not rely on the theme to crop. Keep the subject large enough and leave room for text overlays when needed.
Step 3: Fix exposure and contrast
In GIMP or Photopea, use Levels to set clean whites and blacks. Use Curves for gentle contrast. Avoid crushing shadows on product images.
Step 4: Correct color
Fix white balance first, then adjust saturation with restraint. Keep product colors accurate and consistent across the catalog.
Step 5: Clean noise, then sharpen
Order matters. Reduce noise first, then sharpen last. Use a light touch to avoid halos and harsh edges.
Step 6: Upscale only when needed
If the image is too small for the required display size, upscale with Upscayl. Then apply light sharpening. Do not upscale everything.
Step 7: Export at the correct dimensions
Export at the width your site needs. If your content column is around 820 px, export at 1200 px for crispness on high density screens.
Step 8: Convert and compress
Export in WebP when possible. Use Squoosh to tune quality. Keep the smallest file that still looks clean.
Recommended settings that work in real projects
| Image type | Format | Typical width | Quality target | Notes |
|---|---|---|---|---|
| Photos (people, office, lifestyle) | WebP | 1600 to 2400 (hero), 1200 (content) | 65 to 80 | Light noise reduction, light sharpening |
| Product photos | WebP | 1200 to 2000 | 70 to 85 | Avoid aggressive AI changes |
| Graphics, UI screenshots, icons | SVG, or PNG / lossless WebP | As needed | Lossless | Avoid JPEG for text |
Batch enhancement for existing websites
If your site has hundreds of images, manual editing is not realistic. Use a batch plan: export a list of your media, download originals where possible, batch resize to sensible max widths, convert to WebP, compress, then re-upload and replace.
Keep it consistent: one max width for content images, one for hero images, and one quality target per format. Consistency is what makes a library look premium.
Website delivery tips that multiply the gains
Edits help, but delivery settings often decide real speed. Use responsive images so mobile downloads smaller files. Enable lazy loading below the fold. Preload the hero image when it drives first paint. Serve WebP where supported. Use descriptive alt text for accessibility and context.
Common mistakes that ruin quality
Most quality problems come from workflow mistakes: uploading phone images at full size, over-sharpening, using JPEG for text graphics, ignoring color consistency, upscaling everything with AI, or exporting the same file many times and stacking compression loss.
Keep one clean master file per key visual. Export web versions from the master.
A fast checklist for each image
| Check | Goal |
|---|---|
| Crop matches layout | Better framing and clearer message |
| Width matches real usage | No wasted bandwidth |
| Exposure and color corrected | Consistent brand look |
| Noise reduced, sharpening last | Clean detail without halos |
| WebP export and compression | Smaller files, fast pages |
| Alt text added | Accessibility and relevance |
What to do next
If you want a tailored plan, send one key page URL and your CMS (WordPress, Shopify, Webflow, custom). I will propose exact target widths, formats, and a simple free workflow for your media library.