
Bluestacks is a powerful Android emulator for PC that has gained popularity due to its ability to seamlessly run Android apps and games on a Windows or Mac computer. With Bluestacks, you can enjoy the vast library of apps available on the Google Play Store right from the comfort of your desktop. Whether you’re a mobile developer looking to test your applications or simply someone who wants to enjoy their favorite Android games on a larger screen, Bluestacks provides a user-friendly and efficient platform for emulating the Android experience on your PC. In this article, we will explore the key features and benefits of Bluestacks, discussing everything you need to know about this emulator to enhance your Android experience on your PC.
What is Bluestacks?
Overview of Bluestacks
Bluestacks is a widely used Android emulator that allows users to run Android applications on their PCs. It provides a virtual Android environment on your desktop, giving you the ability to enjoy your favorite Android games and applications on a larger screen.
Purpose of Bluestacks
The main purpose of Bluestacks is to bridge the gap between mobile and desktop platforms. It allows users to have the convenience of using their preferred Android apps on a PC without the need for a physical Android device.
Features of Bluestacks
Bluestacks offers a range of features that enhance the overall Android experience on a PC. Some notable features include:
- Multi-Instance: Bluestacks allows you to run multiple Android instances simultaneously, enabling you to use different apps or play different games on separate windows.
- Game Controls: It provides customizable game controls, allowing you to play Android games using your keyboard and mouse for a more precise and immersive gaming experience. You can also connect external controllers for a console-like gameplay.
- Synchronization: Bluestacks enables you to sync your Android device with the emulator, allowing you to transfer files, contacts, and other data seamlessly between your mobile and PC.
- Screen Recording: It offers a built-in screen recording feature, which is useful for creating tutorial videos or sharing your gameplay with others.
- Shaking Function: Bluestacks allows you to shake the virtual Android device, ideal for games or apps that require shaking motion.
- Compatibility: Bluestacks supports a wide range of apps and games, including popular titles like PUBG Mobile, Clash of Clans, Instagram, and more.
System Requirements
Minimum requirements
To install and run Bluestacks smoothly, your PC must meet the following minimum system requirements:
- Operating System: Windows 7 or later, macOS Yosemite or later
- Processor: Intel or AMD Processor with virtualization extensions (VT-x or AMD-V) enabled in the BIOS
- RAM: At least 2GB of RAM
- Storage: At least 5GB of free disk space
- Graphics: Intel HD Graphics 3000 or higher
- Internet: Stable internet connection
Recommended requirements
For optimal performance and enhanced graphics quality, it is recommended to have the following specifications on your PC:
- Operating System: Windows 10 or later, macOS Sierra or later
- Processor: Intel Core i5 or higher
- RAM: 8GB or higher
- Storage: SSD with at least 10GB of free disk space
- Graphics: NVIDIA GeForce 8600 or equivalent or higher
- Internet: Broadband internet connection
Downloading and Installing Bluestacks
Official website
To download Bluestacks, you can visit the official website at www.bluestacks.com. From the website, navigate to the “Downloads” section and select the appropriate version for your operating system.
Step-by-step installation guide
Once you have downloaded the Bluestacks installer, follow these steps to install it on your PC:
- Locate the downloaded installer file and double-click on it to start the installation process.
- Follow the on-screen instructions to proceed with the installation.
- Choose the installation location and click “Install” to begin the installation process.
- Wait for the installation to complete. This may take a few minutes, depending on your system’s performance.
- Once the installation is finished, you can launch Bluestacks by double-clicking its desktop shortcut or by searching for it in the Start menu.
Common troubleshooting tips
If you encounter any issues during the installation process or while running Bluestacks, here are some common troubleshooting tips:
- Ensure that your PC meets the minimum system requirements mentioned earlier.
- Make sure to disable any antivirus or firewall software that may interfere with the installation process.
- Update your graphics drivers to the latest version.
- Restart your PC and try reinstalling Bluestacks.
- If the issue persists, you can visit the Bluestacks support website or contact their customer support for further assistance.
Using Bluestacks
Setting up Bluestacks
To get started with Bluestacks, follow these steps to set it up on your PC:
- Launch Bluestacks by double-clicking its desktop shortcut or searching for it in the Start menu.
- Upon launching, you will be prompted to sign in with your Google account. If you have an existing Google account, enter your credentials and click “Sign In.” If you don’t have a Google account, you can create one by clicking “Create account.”
- Once signed in, you will be presented with the Bluestacks home screen, which resembles the Android home screen.
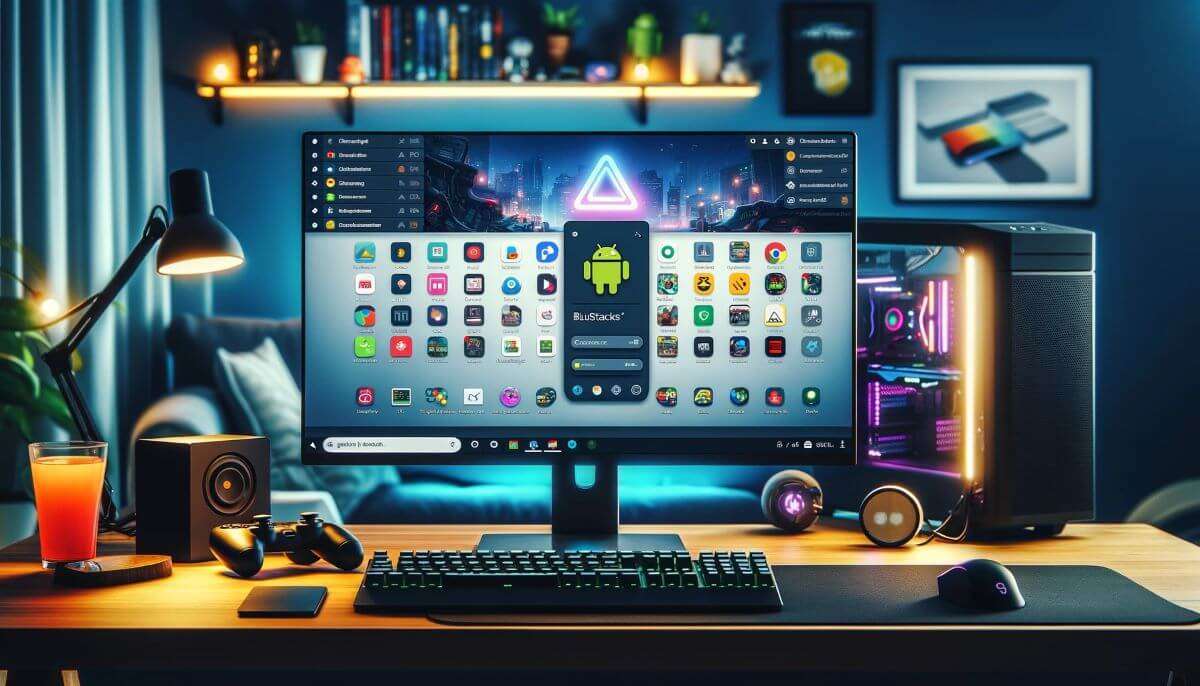
Navigating the Bluestacks interface
The Bluestacks interface is designed to simulate the Android user experience on a PC. Here’s an overview of the different elements and navigational features:
- Home Screen: This is the main screen of Bluestacks, where you can access installed apps, search for apps, and customize the appearance of your device.
- App Drawer: Similar to an Android device, the app drawer contains all installed apps on Bluestacks. You can access the app drawer by clicking on the “App Center” icon located at the bottom of the screen.
- Task Bar: Located at the bottom of the screen, the taskbar displays essential navigation buttons, such as the Home button, Back button, and Menu button. It also includes volume and brightness controls.
- Toolbar: The toolbar is located on the right side of the Bluestacks window and provides quick access to various features and settings, including screen rotation, screen recording, shaking function, game controls, and more.
Customizing settings
Bluestacks offers a range of settings that allow you to customize the emulator according to your preferences. Here are some key settings you can explore:
- Preferences: Access the Preferences menu to configure general settings such as language, location, notification preferences, and more.
- Display: Adjust the display resolution, screen orientation, DPI settings, and fullscreen mode.
- Keyboard Mapping: Customize the keyboard mapping for games and apps to match your preferred controls.
- Engine: Optimize performance by adjusting the CPU and RAM allocation settings.
- Audio: Adjust the sound settings, including volume and microphone input.
- Account: Manage your Google account settings and sync preferences.
Accessing the Google Play Store
Bluestacks provides access to the Google Play Store, allowing you to download and install apps directly from the Play Store. To access the Play Store, follow these steps:
- Launch Bluestacks and navigate to the home screen.
- Open the Play Store app from either the App Drawer or the “My Apps” section.
- Sign in with your Google account credentials to access the Play Store.
- Search for the desired app using the search bar or browse various categories.
- Once you find the app you want, click on the install button to download and install it on Bluestacks.
Installing and managing apps
Bluestacks allows you to install apps from various sources, including the Google Play Store, external APK files, and even sideloading apps from your Android device. Here’s how you can install and manage apps on Bluestacks:
- For apps from the Google Play Store, follow the steps mentioned in the previous section.
- To install apps from external APK files, simply double-click the APK file, and Bluestacks will automatically install it.
- To sideload apps from your Android device, you can use the “My PC” feature in Bluestacks. Connect your Android device to your PC, navigate to the “My PC” section in Bluestacks, and browse the device’s storage to find the APK file you want to install.
- To manage installed apps, you can organize them into folders, create shortcuts on the home screen, uninstall unwanted apps, and update apps directly from the Google Play Store.
Syncing with your Android device
Bluestacks offers synchronization capabilities that allow you to sync data between the emulator and your Android device. Here’s how you can sync your Android device with Bluestacks:
- Launch Bluestacks and sign in with the same Google account that you use on your Android device.
- Open the settings menu in Bluestacks and navigate to the “Preferences” section.
- Enable sync for various options, including app data, contacts, messages, and more.
- On your Android device, ensure that you have enabled sync for the same Google account used in Bluestacks.
- The selected data will now sync between your Android device and Bluestacks, ensuring seamless integration and data transfer.
Performance and Compatibility
Optimizing Bluestacks for performance
To optimize Bluestacks for the best performance, you can consider the following tips:
- Allocate Sufficient Resources: Ensure that your PC meets the recommended system requirements, especially in terms of RAM and processor power. Allocating more RAM and CPU cores to Bluestacks in the settings can also improve performance.
- Update Graphics Drivers: Make sure your graphics drivers are up-to-date. Outdated drivers can impact gaming performance and graphics quality.
- Close Unnecessary Background Applications: Closing resource-intensive applications running in the background can free up system resources and improve overall performance.
- Adjust Bluestacks Settings: Experiment with the Bluestacks settings, such as the graphics modes or the CPU allocation, to find the optimal balance between performance and visual quality.
- Regularly Update Bluestacks: Check for and install updates for Bluestacks regularly as they often include performance optimizations and bug fixes.
Supported Android versions and applications
Bluestacks supports a wide range of Android versions, ensuring compatibility with the majority of Android applications available on the market. However, it’s important to note that Bluestacks may not support all Android applications due to various factors, such as device-specific features or compatibility issues.
To ensure compatibility, Bluestacks provides a compatibility guide on its official website. This guide lists the popular applications that have been tested and confirmed to work well with Bluestacks.
Compatibility with various PC configurations
Bluestacks is designed to run on a variety of PC configurations. It is compatible with both Windows and macOS operating systems, providing a seamless Android experience regardless of the platform.
Bluestacks is optimized to work with various PC configurations, including low-end systems. However, it’s important to note that Bluestacks may perform differently based on the specifications of your PC. Higher-end systems with better hardware configurations generally provide better performance and visual quality.
Security and Privacy
Understanding permissions and data access
Bluestacks, like any Android emulator, requires permissions to function properly and provide the desired user experience. These permissions allow Bluestacks to access your system files, hardware resources, and internet connection.
When you launch Bluestacks for the first time, you will be presented with a series of permission requests that grant access to your connected devices, such as the microphone and camera, and your internet connection. These permissions are necessary for certain applications or games that require these features.
Protecting your personal information
To protect your personal information while using Bluestacks, consider implementing the following security practices:
- Use Trusted Sources: Only download apps and games from reputable sources such as the Google Play Store to minimize the risk of downloading malware-infected applications.
- Regular Updates: Keep Bluestacks, as well as your antivirus and firewall software, up-to-date with the latest security patches and updates to defend against new threats.
- Install Anti-Malware Software: Consider installing a reliable anti-malware software on your PC to provide an additional layer of protection against potential threats.
- Be Cautious with Permissions: Pay attention to the permissions requested by applications installed within Bluestacks. Avoid granting unnecessary permissions that may compromise your privacy.
- Use Strong Passwords: Ensure that you use strong, unique passwords for your Google account and any other accounts associated with Bluestacks.
Avoiding malware and security threats
To avoid malware and security threats while using Bluestacks, follow these best practices:
- Stick to Secure Sources: Download apps and games only from trusted sources such as the Google Play Store. Avoid downloading apps from unfamiliar or unofficial websites, as they may contain malware.
- Enable Google Play Protect: Make sure to enable Google Play Protect on Bluestacks. Google Play Protect scans your installed apps for potential malware and keeps your device protected.
- Update Regularly: Keep Bluestacks, your apps, and your operating system up-to-date with the latest security patches and updates to minimize vulnerabilities.
- Use Antivirus Software: Install a reputable antivirus software on your PC and keep it updated to detect and remove any potential threats.
- Exercise Caution with Links and Emails: Be cautious when clicking on links or opening emails within Bluestacks, as they may lead to phishing attempts or malicious websites.
Upgrading and Uninstalling Bluestacks
Updating to the latest version
To update Bluestacks to the latest version, follow these steps:
- Launch Bluestacks and click on the “Bluestacks” tab located at the top-left corner of the window.
- From the drop-down menu, select “Check for updates.” Bluestacks will automatically check for any available updates.
- If an update is available, click on the “Install Now” button to begin the update process. Follow the on-screen instructions to complete the update.
- Once the update is finished, Bluestacks will restart, and you will be ready to use the latest version.
Transferring data to a new version
When upgrading to a new version of Bluestacks, you can transfer your data, such as apps and game progress, to the new version by following these steps:
- Backup Data: Before upgrading, make sure to backup your important app data, game progress, and any other data you wish to transfer. Most apps offer a backup or cloud-sync feature within the app itself.
- Install the New Version: Download and install the new version of Bluestacks using the same steps mentioned earlier.
- Sign In with Google Account: Launch the new version of Bluestacks and sign in with your Google account, ensuring that you use the same account as in the previous version.
- Restore Backed-up Data: After signing in, follow the app-specific instructions to restore your data. This may involve signing in to individual apps or restoring from backups created within the apps themselves.
Uninstalling Bluestacks from your PC
If you wish to uninstall Bluestacks from your PC, follow these steps:
- Close Bluestacks if it is currently running.
- Open the Control Panel on your PC and navigate to the “Programs” or “Programs and Features” section.
- Locate and select “Bluestacks” from the list of installed programs.
- Click on the “Uninstall” or “Remove” option.
- Follow the on-screen prompts to complete the uninstallation process.
- Once the uninstallation is finished, restart your PC to remove any remaining components of Bluestacks.
Alternatives to Bluestacks
Other Android emulators for PC
While Bluestacks is one of the most popular Android emulators for PC, there are several alternatives available that offer similar functionality. Some notable Android emulators include:
- NoxPlayer: NoxPlayer is a free Android emulator that offers a smooth and stable Android experience on a PC. It supports a wide range of apps and games and provides advanced features such as multi-instance, keyboard mapping, gamepad support, and more.
- MEmu Play: MEmu Play is another powerful Android emulator that focuses on gaming. It offers a high-performance gaming experience with features like keymapping, macro support, full-screen mode, and compatibility with both Intel and AMD processors.
- LDPlayer: LDPlayer is known for its emphasis on gaming performance, providing a range of tools and features to enhance gameplay. It supports custom keyboard mapping, multiple instances, multiplayer synchronization, and many other gaming-related features.
- Genymotion: Genymotion is a feature-rich Android emulator that targets developers and testers. It offers extensive compatibility with various Android devices, including Google Nexus and Samsung Galaxy models. It also provides advanced features like simulated GPS, battery testing, and network simulation.
Pros and cons of different emulators
Choosing the right Android emulator for your PC depends on your specific needs and preferences. Here are some pros and cons of different emulators to help you make an informed decision:
- Bluestacks:
- Pros: Widely used and well-established, excellent app compatibility, user-friendly interface, regular updates.
- Cons: Can be resource-intensive, occasional performance issues, limited customization options.
- NoxPlayer:
- Pros: Stable and smooth performance, multitude of customization options, support for both Intel and AMD processors, multi-instance capability.
- Cons: Some compatibility issues with specific apps or games, occasional crashes or instability.
- MEmu Play:
- Pros: Optimized for gaming, support for both Intel and AMD processors, custom keymapping, good performance and stability.
- Cons: Limited features compared to other emulators, occasional compatibility issues.
- LDPlayer:
- Pros: Focus on gaming performance, comprehensive game-related features, multi-instance capability, excellent stability.
- Cons: Limited features for non-gaming purposes, occasional compatibility issues with certain apps.
- Genymotion:
- Pros: Targeted towards developers and testers, extensive device compatibility, advanced features for app testing and development.
- Cons: Requires more technical knowledge, complex setup process, limited features for general users.
Ultimately, the best emulator for you will depend on your specific requirements, such as performance, customization options, or game-focused features.
Frequently Asked Questions
Is Bluestacks safe?
Yes, Bluestacks is generally safe to use. It is a reputable and widely used Android emulator that has been around for several years. However, as with any software, it’s important to download Bluestacks from the official website or other trusted sources to ensure the integrity and security of the installer.
Can I run Bluestacks on a Mac? Yes, Bluestacks is available for both Windows and macOS. You can download the macOS version of Bluestacks from the official website and install it on your Mac.
How to fix common Bluestacks errors? If you encounter common errors while using Bluestacks, there are several troubleshooting steps you can try:
- Restart your PC and relaunch Bluestacks.
- Update your graphics drivers to the latest version.
- Disable any antivirus or firewall software temporarily to check if they are causing conflicts.
- Reinstall Bluestacks using the latest version from the official website.
- Contact Bluestacks support for further assistance if the issue persists.
Can I use Bluestacks without a Google account? No, you need a Google account to use Bluestacks. The Google account is required to access the Google Play Store, download apps, and sync data between your PC and Android device.
Conclusion
Summary of Bluestacks features and advantages
Bluestacks is a comprehensive Android emulator for PC that allows users to run Android applications and games on their desktops or laptops. Its features include multi-instance support, customizable game controls, synchronization with Android devices, screen recording, and compatibility with a wide range of apps and games. Bluestacks provides a user-friendly interface, regular updates, and a seamless Android experience on a PC.
Final thoughts on using Bluestacks on PC
Bluestacks offers a convenient solution for those who want to experience Android apps and games on a PC. Whether you want to enjoy your favorite mobile games on a bigger screen, use productivity apps with more screen real estate, or sync data between your mobile and PC, Bluestacks provides a reliable and user-friendly environment.
While Bluestacks is one of the most popular options available, there are other Android emulators that offer alternative features and capabilities. It’s important to consider your specific requirements and preferences when choosing an Android emulator for your PC. With the right emulator, you can unlock the full potential of Android apps and games on your desktop or laptop.